No products in the cart.
How to Import Unsupported Files into Adobe Premiere Pro

- French version down below. -
Adobe Premiere Pro is a powerful and widely trusted video editing tool — no doubt about that.
But even the best software has its quirks.
If you’ve ever tried importing certain files into Premiere, only to be met with an error or silence… you’re not alone.
Let’s talk about a common issue:
Unsupported file formats.
The Problem: Premiere Doesn’t Like Certain Formats
Some files just don’t play nice with Premiere. For example:
MKVfiles – often used to package digital versions of Blu-rays- AV1 codec – a newer, highly efficient codec found in some YouTube videos
Or even other, less common formats that Premiere simply refuses to read.
So what can you do when Premiere throws a tantrum?
You’ve got two solid options:
- ✅ One free
- 💼 One paid (but seriously worth it if you work professionally)
Free Solution: Transcode with HandBrake
If you only run into these files from time to time, HandBrake is a fantastic free tool for transcoding them into a format Premiere understands.
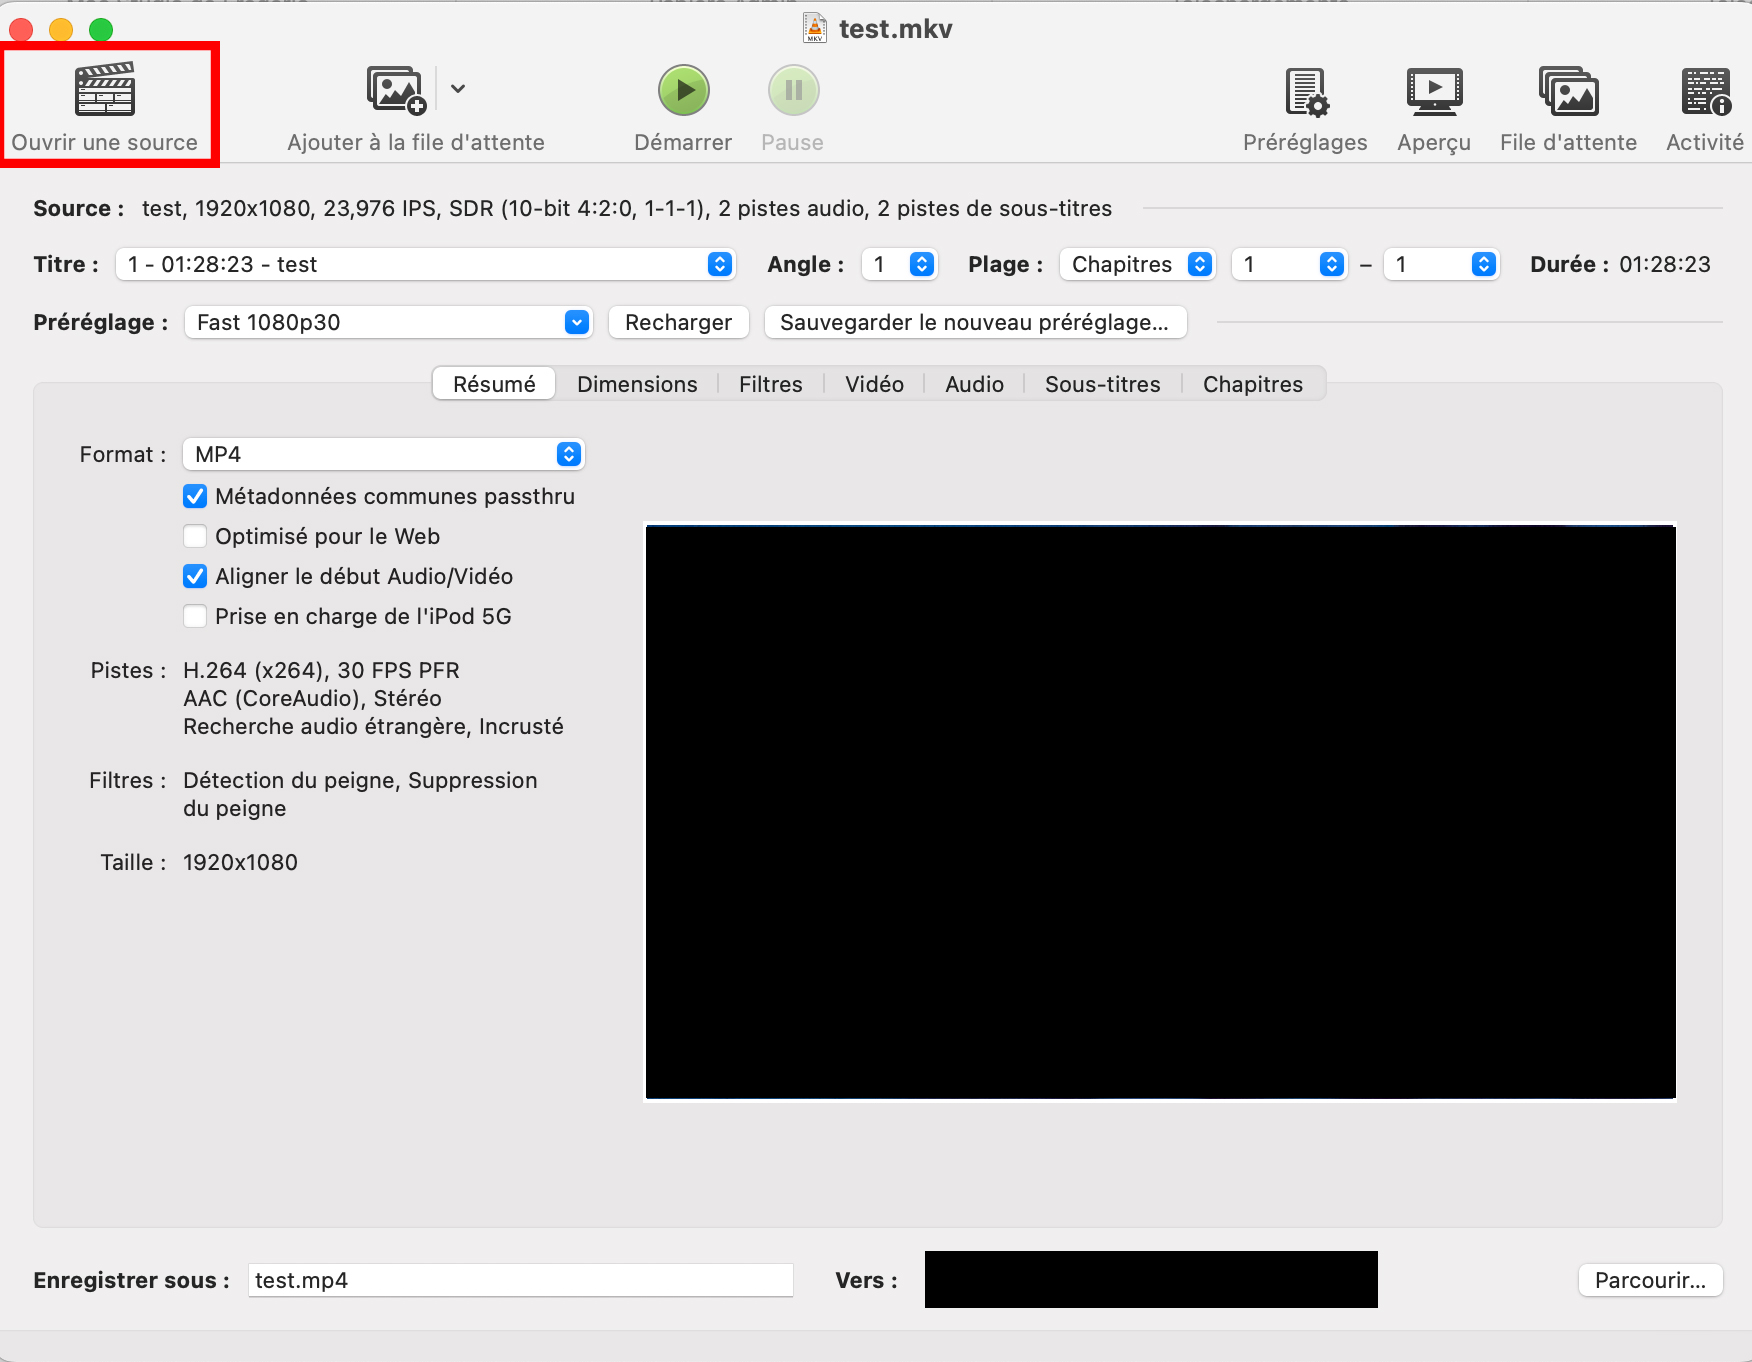
How to use HandBrake:
- Open your file with HandBrake.
- Choose a preset and output format.
👉 Tip: Use MP4 with the H.264 (x264) codec — it’s the most compatible. - For advanced users:
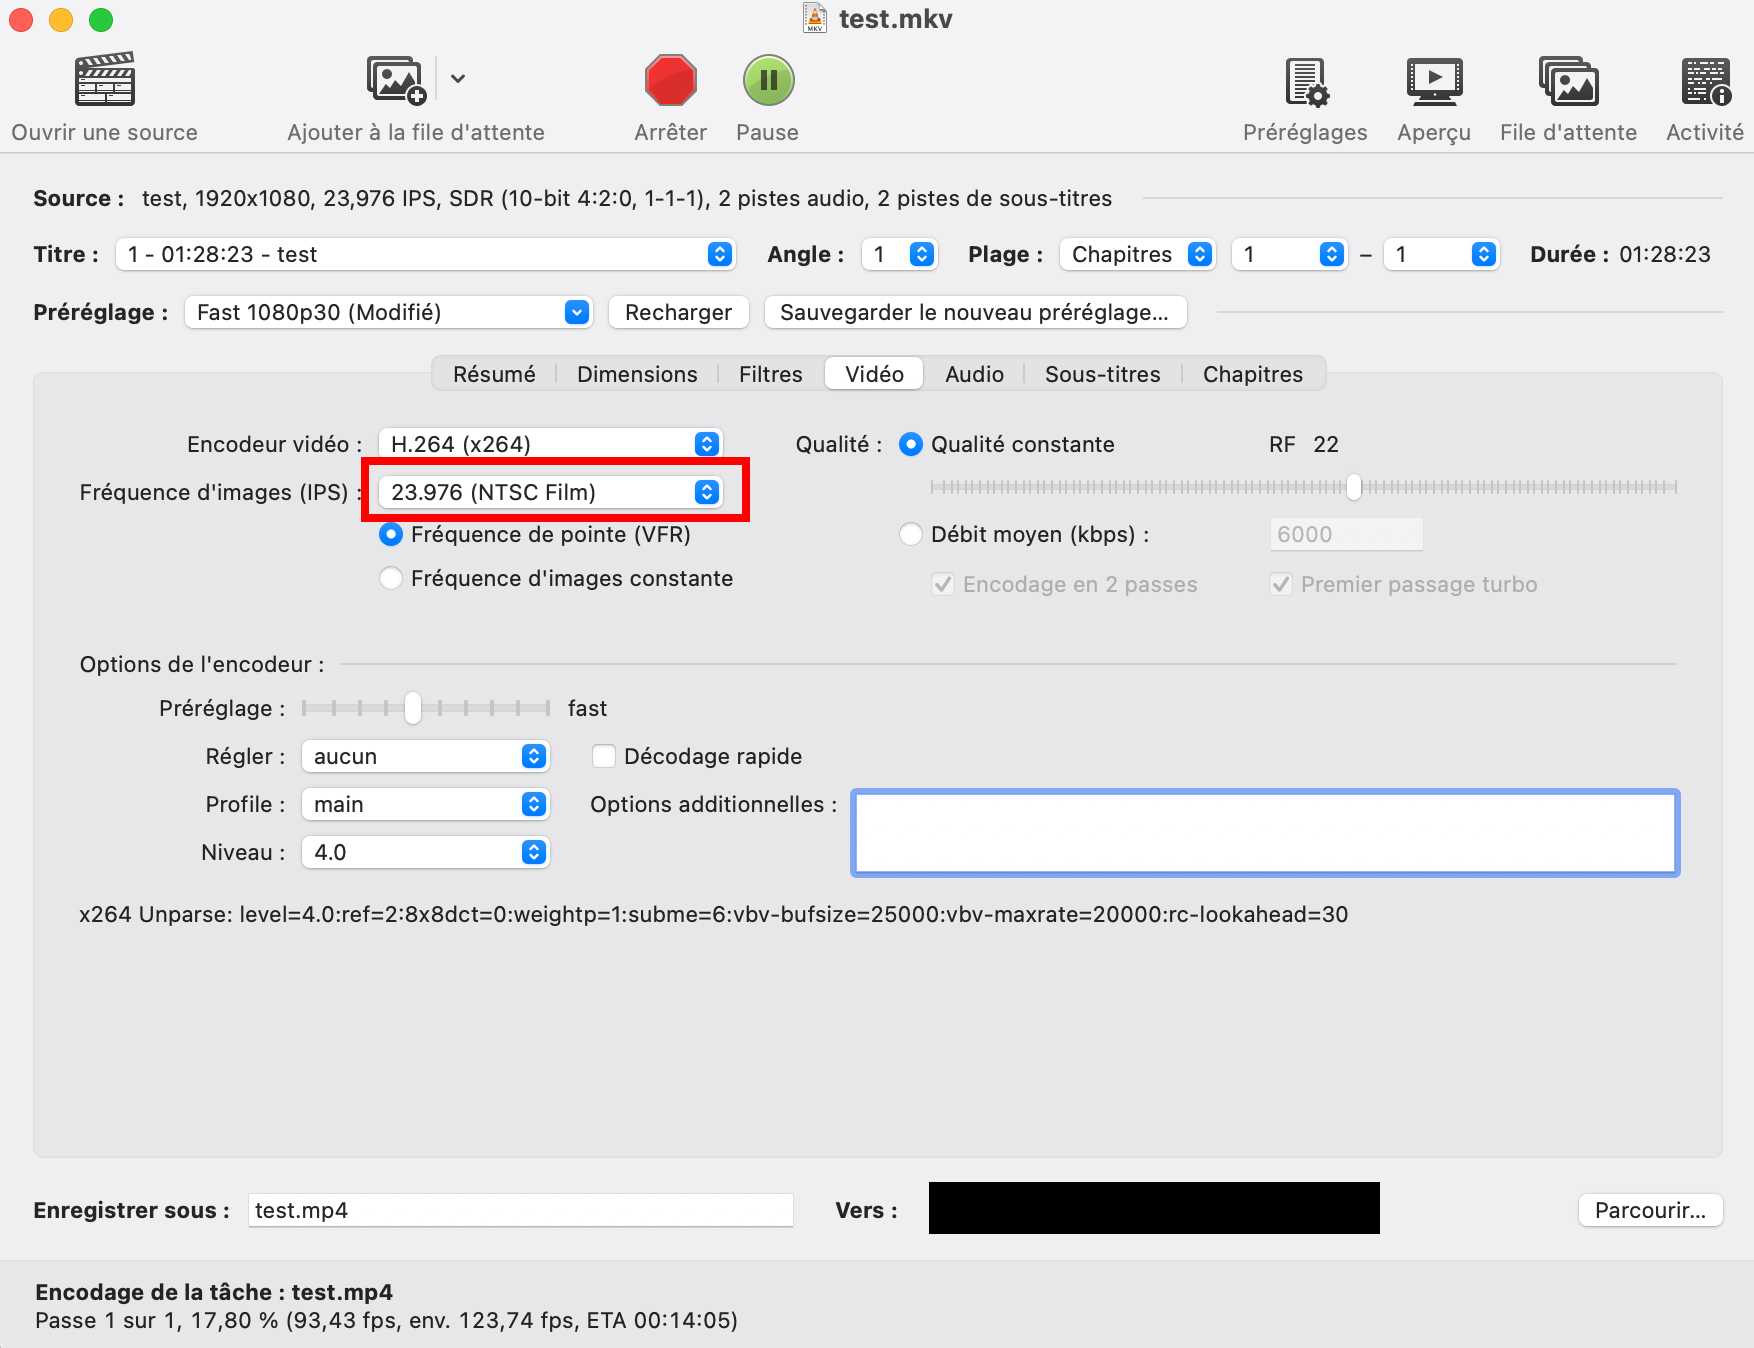
Go to the Video tab to tweak settings like bitrate or frame rate.
Be careful to match the frame rate with the original video!
Use the « Same as source » option if unsure.
- Click Start Encode.
That’s it — you’ll end up with a file that Premiere Pro can handle without complaints.
⚠️ Note: Encoding time will vary depending on your file size and computer power.
Pro Solution: AutoKroma Influx
If you work with Adobe software daily, Influx is a serious time-saver.
For under €100, you can skip the whole transcoding process entirely.
What Influx does:
- Supports a wide range of video and audio formats natively in Premiere Pro
- Handles import automatically — no manual conversion
- Works fast, even with large files
- Saves you hours over time
Just drag and drop your file — Premiere will open it like any other.
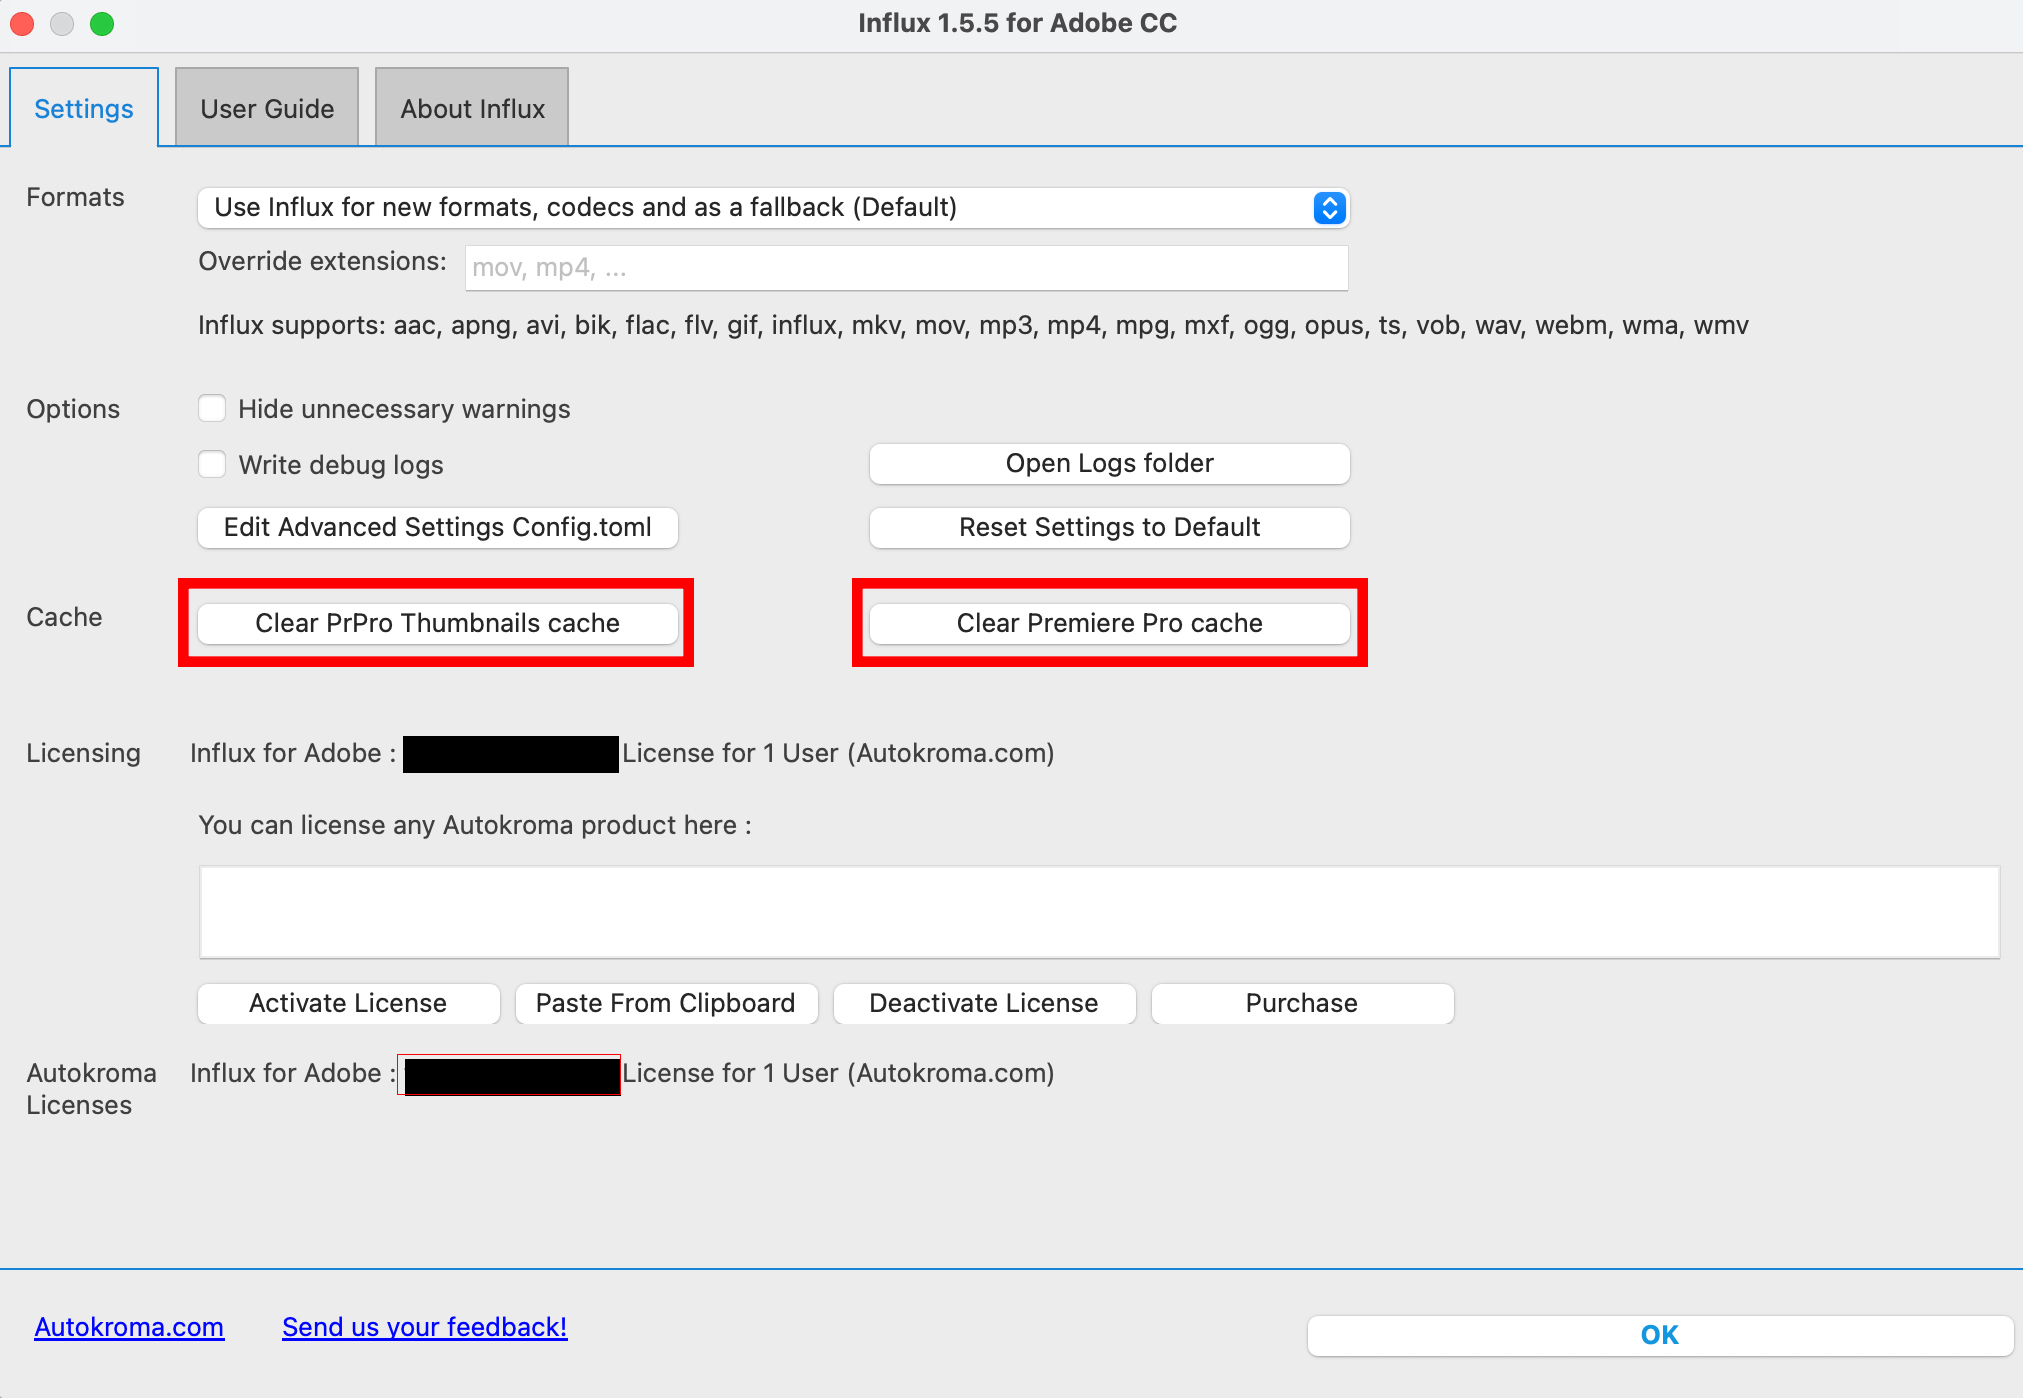
🧹 Don’t forget to clear the cache!
- Influx stores temporary files to speed things up, but over time, they can pile up.
- Here’s how to clean it up:
- Open the Influx app from your applications folder
- Click both “Clear Cache” buttons
- Done.
Bonus: Works With Other Adobe Apps
Influx isn’t just for Premiere Pro — it also works with:
- After Effects
- Media Encoder
- Audition (great for handling audio formats like FLAC)
Final Thoughts
Whether you’re editing a quick YouTube video or working on a high-end project, unsupported file formats can slow you down.
- Use HandBrake if it’s a one-off
- Invest in Influx if you’re in this daily
Either way, your workflow just got smoother.
Importer des fichiers non pris en charge dans Premiere Pro : deux solutions simples
Premiere Pro, de la suite Adobe, est un outil puissant et populaire.
Aucun doute là-dessus.
Mais même les meilleurs logiciels peuvent parfois avoir leurs limites.
Et ici, je parle d’un souci bien connu :
👉 tous ces fichiers que Premiere refuse tout simplement d’ouvrir.
Le problème : certains formats ne passent pas
On pense notamment aux :
- .mkv — format très courant, notamment pour encapsuler des Blu-ray dématérialisés (achetés légalement, bien entendu 😇)
- AV1 — un codec plus récent, souvent utilisé sur YouTube
- Et d’autres formats ou codecs plus « exotiques » que Premiere ne prend pas en charge nativement
Heureusement, il existe deux solutions :
- ✅ Une gratuite, simple et efficace
- 💼 Une payante, ultra pratique pour les pros
Solution gratuite : transcoder avec HandBrake
Si vous tombez de temps en temps sur des fichiers problématiques (comme les .mkv), je vous recommande d’utiliser HandBrake, un logiciel gratuit, pour les transcoder dans un format que Premiere reconnaît sans souci.
Comment faire :
- Ouvrez votre fichier source avec HandBrake
- Choisissez un pré-réglage et un format de sortie
👉 Le .mp4 avec le codec H264 / x264 est le plus universel - Pour aller plus loin, allez dans l’onglet Vidéo et ajustez les réglages
⚠️ Pensez à respecter le frame rate de la source
➕ Astuce : vous pouvez sélectionner “Comme la source” dans le menu déroulant pour éviter toute erreur - Lancez l’encodage
Et voilà. Vous obtenez un fichier que Premiere Pro acceptera sans broncher.
🕒 Bien sûr, le temps d’encodage dépendra du poids du fichier et de la puissance de votre machine.
Solution payante : Influx d’AutoKroma
🔗 https://www.autokroma.com/Influx
Si vous utilisez la suite Adobe de façon professionnelle, c’est clairement l’option à privilégier.
Pour moins de 100 €, vous vous offrez la tranquillité d’esprit :
- Plus besoin de transcoder manuellement
- Vous importez n’importe quel fichier dans Premiere sans réfléchir
- Le transcodage se fait en quelques secondes, automatiquement
🧹 Attention au cache !
Influx génère du cache pour accélérer les choses. Mais si vous ne le videz jamais, votre disque va vite se remplir.
Voici la procédure :
- Ouvrez l’application Influx dans vos logiciels installés
- Cliquez sur les deux boutons « Clear cache »
Simple et efficace.
Bonus : Influx fonctionne aussi avec d’autres logiciels Adobe
Influx n’est pas limité à Premiere Pro ! Il est aussi compatible avec :
- After Effects
- Media Encoder
- Audition (très pratique pour les fichiers audio comme le FLAC)
En résumé
Les fichiers non pris en charge, ça peut vite devenir un cauchemar quand on bosse sur un projet.
Mais pas de panique :
- 🎯 HandBrake est parfait pour un usage occasionnel
- 🚀 Influx est idéal si vous êtes pro ou que vous voulez gagner un temps fou
À vous de choisir la solution qui colle à votre besoin !